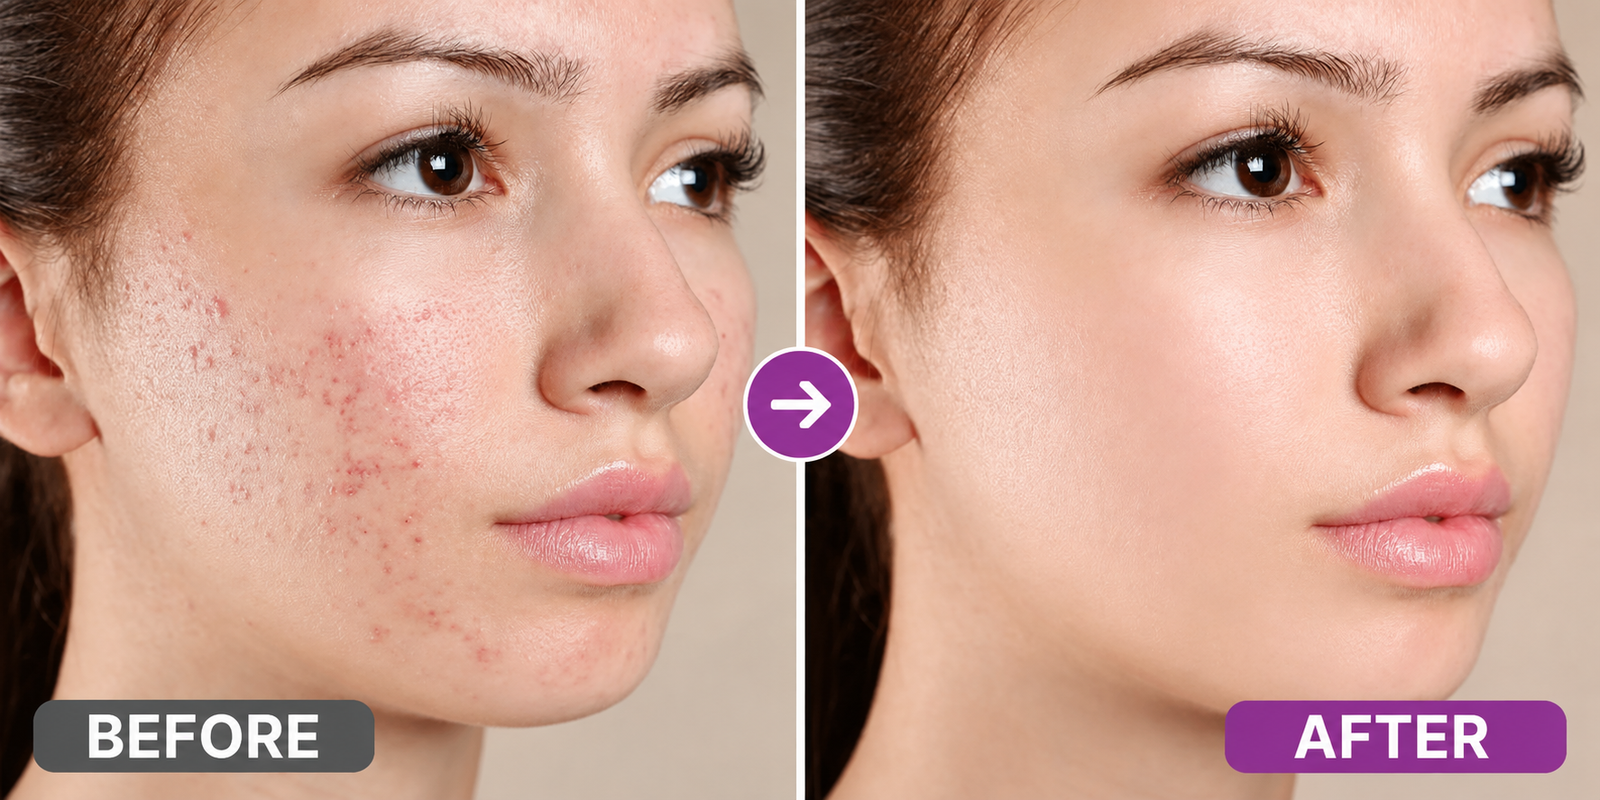
You’ve probably taken selfies or portrait photos for social media, professional profiles, or personal branding, only to notice acne, blemishes, redness, or uneven skin texture. Traditional retouching can take time, and excessive smoothing may make your photos look artificial. In this guide, you’ll learn how an AI skin enhancer works and how to use Photo AI Studio to improve portrait photos with a practical, natural-looking editing workflow.
A survey of 5,119 American adults, conducted in February 2026, found that only 24% of Americans use AI for creating and editing images or videos – Source: Pew Research Center, June 2026.
Key Takeaways
- AI skin enhancers use artificial intelligence to adjust the appearance of facial skin in digital photos.
- Skin enhancement methods include blemish reduction, smoothing, skin tone adjustments, and portrait retouching.
- AI photo editing can reduce repetitive manual work and support faster portrait enhancement.
- Photo AI Studio provides an AI Skin Enhancer tool with an upload-and-generate workflow.
- Natural-looking results require balanced adjustments that preserve facial details and skin texture.
- Portrait quality depends on the original image, enhancement settings, and editing workflow.
- Practical testing helps users identify suitable enhancement levels for different portrait types.
What Is an AI Skin Enhancer and How Does It Work?
An AI skin enhancer is a photo editing tool that uses artificial intelligence to adjust the appearance of facial skin in digital images. The technology analyzes visual information in a portrait and applies automated adjustments intended to improve the appearance of skin.
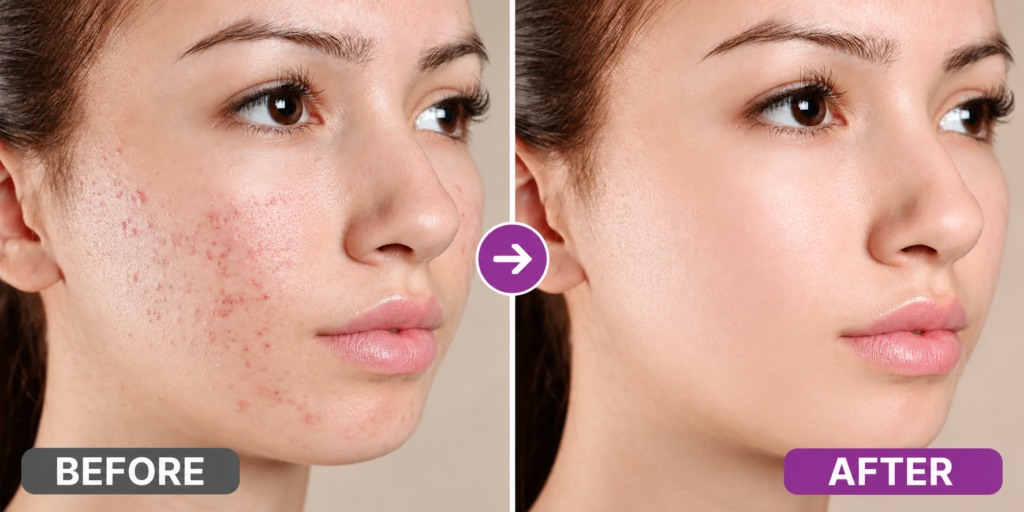
For example, a portrait with visible acne marks or uneven-looking texture may be processed to reduce distracting imperfections while retaining important facial characteristics.
Two of the most rigorous market datasets value the global AI image editing market at USD 88.7 billion in 2025 – Source: Future Market Insights and Emergen Research, 2025.
How AI Detects Facial Skin Areas
AI skin enhancement typically involves image analysis, facial feature recognition, and targeted adjustments. The exact process depends on the software, its model, and the available editing controls.
For example, an AI tool may identify areas around the cheeks, forehead, or chin and apply different levels of retouching rather than treating the entire photograph identically.
AI skin enhancement involves analyzing facial areas and applying selected adjustments, such as blemish reduction or skin smoothing, to modify the appearance of a portrait.
Traditional manual retouching requires the editor to select, adjust, and review specific areas using editing tools. AI-assisted editing can automate parts of this process, although the results still require human review.
Why Should You Use AI Skin Enhancement for Portrait Photos?
AI skin enhancement helps users streamline portrait editing by automating selected adjustments and reducing repetitive manual work. This can be useful for creators, photographers, bloggers, and professionals who regularly prepare portrait images.
For example, a content creator preparing several profile photos may use an AI retouching tool to speed up the initial editing process before reviewing each image.
Adobe’s creator survey found that 86% of creators now actively use creative generative AI across their workflows – Source: Adobe Creator Survey, October 2025.
Faster Editing for Content Creators
AI skin enhancement can simplify routine portrait corrections, especially when users need to process multiple photos. Instead of manually working on every small imperfection, users can begin with an automated result and make further adjustments when necessary.
AI skin enhancers help users streamline portrait retouching by combining automated image analysis with adjustable photo enhancement features.
A 2025 Saal Digital survey of 724 professional and hobby photographers across five European countries reported that 77% used AI for editing and retouching — Source: [Saal Digital, 2025]. This survey reflects its specific participants and regions, not all photographers worldwide.
Consistent Portrait Presentation
Consistent portrait presentation means maintaining a similar visual style across images used for professional or creative purposes. For example, a blogger may want author portraits to have comparable lighting and retouching intensity across multiple articles.
However, consistency should not mean removing every natural facial detail. Balanced editing supports a polished appearance while preserving the characteristics that make a portrait recognizable.
Research found that 90% of young women report using filters to edit their photos before posting them online – Source: Rosalind Gill, City University of London.
What Are the Main Types of AI Skin Enhancement?
AI skin enhancement includes several editing methods designed to modify the appearance of facial skin and selected portrait details. These methods may overlap, and individual tools do not necessarily provide every feature.
| Enhancement Type | Purpose |
|---|---|
| Blemish reduction | Reduces the appearance of selected facial imperfections |
| Skin smoothing | Softens uneven-looking texture while aiming to preserve details |
| Skin tone adjustment | Modifies the visual appearance of overall skin color |
| Facial detail enhancement | Improves selected facial details depending on the tool |
| Portrait retouching | Combines multiple adjustments for a more polished portrait |
Skin Smoothing vs. Facial Enhancement
AI skin smoothing focuses primarily on the appearance of skin texture, while AI face enhancement can involve a broader set of facial or portrait adjustments. The distinction depends on the features provided by the specific software.
For example, skin smoothing may soften the appearance of rough texture, while a broader face enhancement workflow may include improvements to detail, lighting, or other facial areas.
Natural skin enhancement should not automatically remove pores, lines, or other identifying characteristics. The objective is to create an edit that suits the intended use without making the portrait look excessively filtered.
How Can AI Improve Skin Appearance in Photos?
AI can improve the visual appearance of skin in photos by applying automated image adjustments to selected facial areas. The outcome depends on image quality, lighting, the tool’s capabilities, and the chosen enhancement process.
For example, a well-lit close-up portrait may provide clearer visual information for an editing system than a heavily blurred or poorly exposed photograph.
The General AI Skin Enhancement Process
Most AI-powered skin enhancement workflows follow a sequence similar to the following:
- Upload a portrait: Select a suitable image from your device.
- Analyze the image: The AI processes visual information and identifies areas it can edit.
- Apply enhancements: The tool performs its available skin-related adjustments.
- Review the result: Compare the edited image with the original.
- Export the image: Save the result when it meets your requirements.
The exact controls vary between software platforms. Some tools provide manual sliders or multiple enhancement levels, while others use a simpler upload-and-generate interface.
If you’re also working with low-resolution photos, check out our guide on How to Upscale Image Without Losing Quality to make sure every detail stays sharp before you apply any AI enhancements.
How to Use Photo AI Studio for AI Skin Enhancement?
Photo AI Studio provides an AI Skin Enhancer tool that allows users to upload a photo and generate an enhanced result through a simple workflow. Its official tool page describes support for JPEG, PNG, and WEBP uploads up to 10 MB, along with an upload and Generate process — Source: [Photo AI Studio, accessed September 2026].
The following tutorial is based on the described Photo AI Studio workflow. The actual interface, usage limits, and available features may change over time.
Photo AI Studio

Step 1: Open Photo AI Studio
First, open the Photo AI Studio website in your browser. The platform includes different sections for image creation, editing, enhancement, and other AI-powered tools.

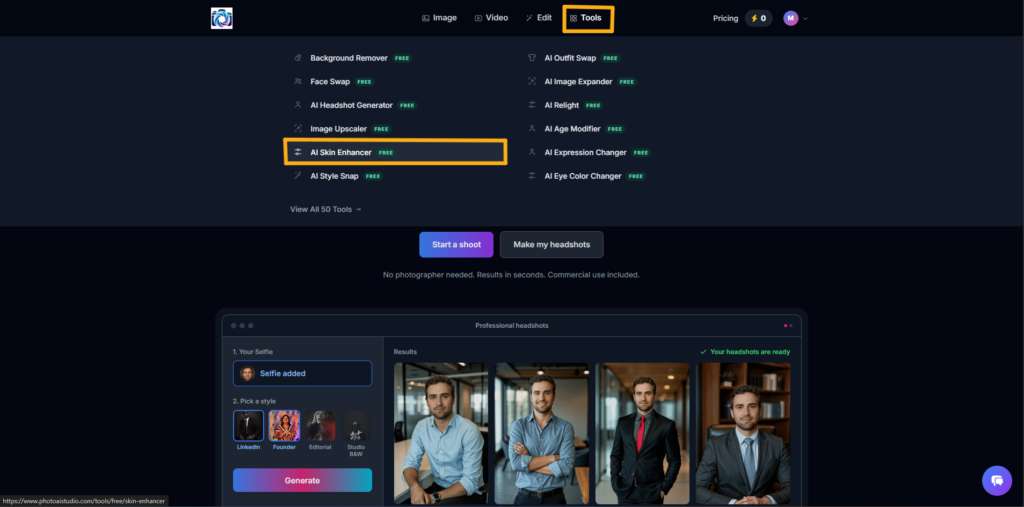
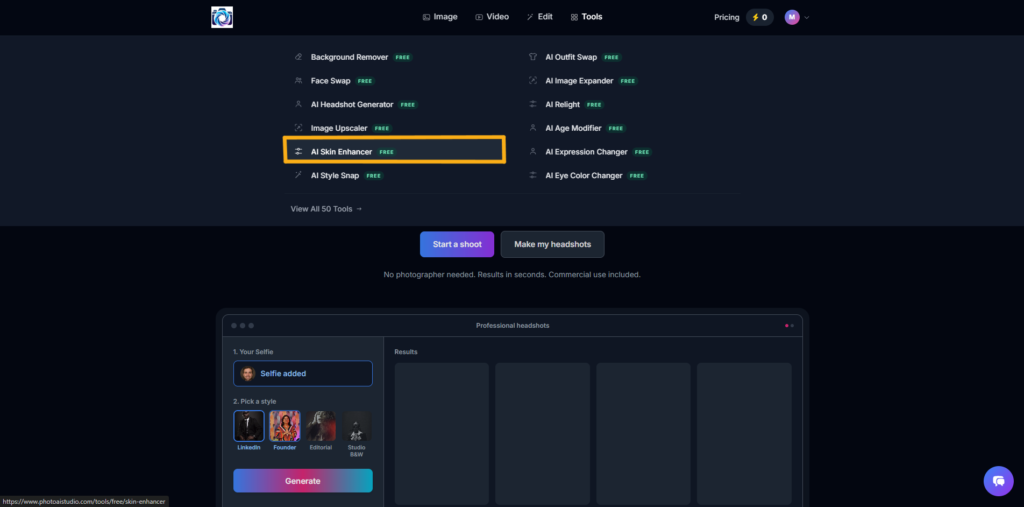
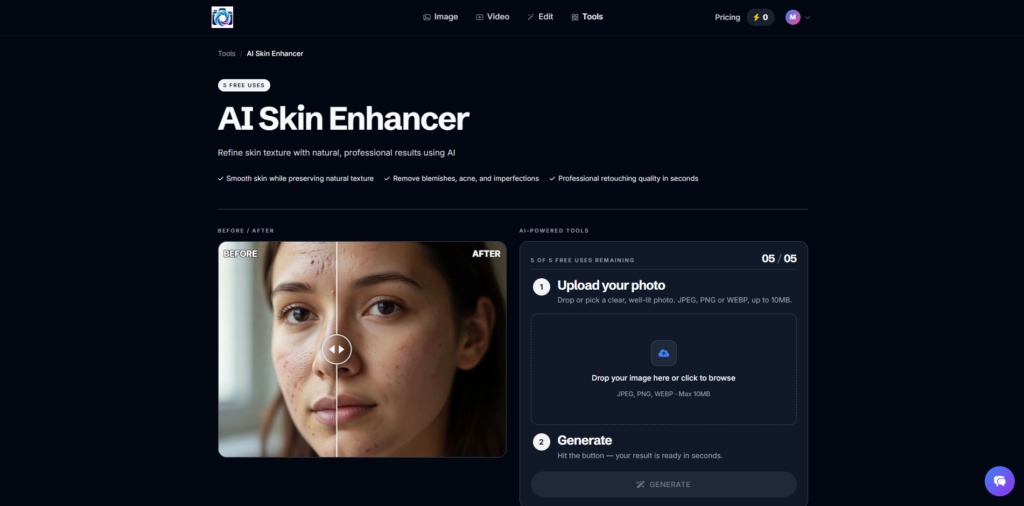
For this demonstration, navigate to the Tools section and locate the AI Skin Enhancer option.
Step 2: Select AI Skin Enhancer
Next, click AI Skin Enhancer to open the dedicated tool. The official page displays before-and-after examples illustrating the intended skin enhancement effect.
For example, you may see an original portrait with visible imperfections alongside a processed image showing a different skin appearance. These examples demonstrate the tool’s intended function, but they do not guarantee the same results for every photo.
Step 3: Upload Your Portrait
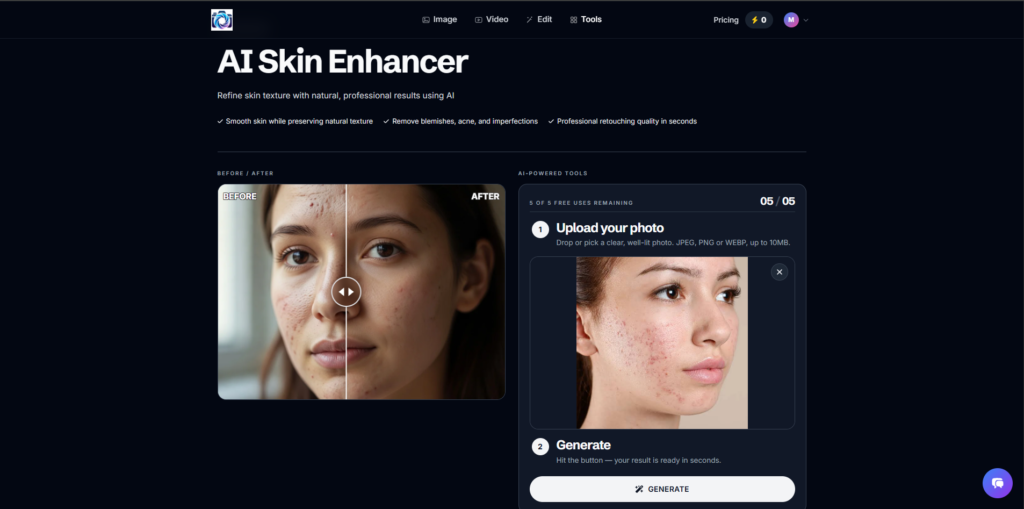
Now, upload a clear portrait or selfie using the upload area. Photo AI Studio’s official tool page lists JPEG, PNG, and WEBP support, with a maximum file size of 10 MB — Source: [Photo AI Studio, 2026].
For this demonstration, choose a close-up portrait where the face is visible and the image is reasonably well lit. A suitable original image helps you evaluate the enhancement more clearly.
Recommended upload checklist:
- Choose a clear portrait with sufficient facial detail.
- Use a photo with reasonable lighting.
- Avoid heavily blurred or severely compressed images.
- Confirm that the image meets the platform’s upload requirements.
Step 4: Click Generate
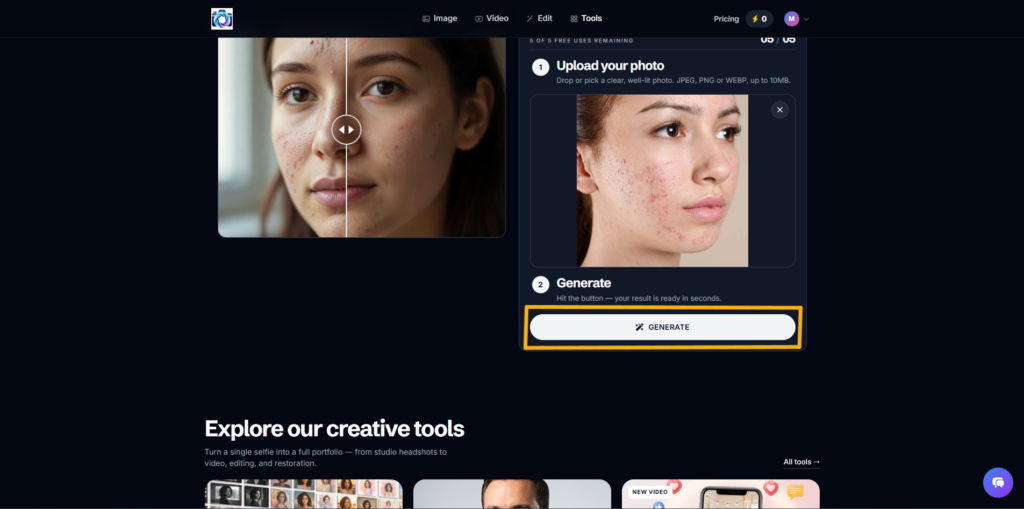
After uploading the image, click Generate to begin the processing workflow. The official tool page describes the Generate button as the second step after uploading a photo — Source: [Photo AI Studio, 2026].
The AI then processes the image according to the tool’s available enhancement functionality. Processing time and the final appearance can vary depending on the platform and original photo.
Step 5: Review the Enhanced Result
Once processing is complete, examine the generated result alongside the original image. Look for changes in skin appearance, facial detail, and the overall realism of the portrait.
For example, the edited photo may show a reduction in visible acne or redness, but you should check whether the result preserves natural facial features and texture.
A generated result should be reviewed rather than accepted automatically. If the image looks overly smooth, artificial, or inconsistent with the original person, consider using a different photo or an alternative editing workflow.
What Are the Best Tips for Natural-Looking AI Skin Retouching?
Natural-looking AI skin enhancement requires balanced adjustments that improve the appearance of a portrait without unnecessarily removing skin texture or facial details. The goal is to support the image’s intended purpose while maintaining a realistic appearance.
Use Subtle Editing and Check Facial Details
First, begin with a suitable original photo and avoid assuming that the strongest available enhancement will produce the best result. A subtle edit may be more appropriate for professional profiles or personal branding.
For example, a portrait used on a blog author’s profile should retain recognizable facial characteristics rather than appearing heavily filtered.
Follow these practical recommendations:
- Start with balanced enhancement: Avoid excessive smoothing whenever the tool offers adjustable controls.
- Review at full resolution: Examine the eyes, hairline, lips, and facial edges for unwanted artifacts.
- Compare original and edited versions: Check whether the enhancement improves the image for its intended purpose.
- Preserve natural details: Avoid unnecessary changes to identifying facial features.
- Use a high-quality original: Good lighting and sufficient detail can make the editing process easier to evaluate.
Who Can Benefit From Using an AI Skin Enhancer?
AI skin enhancers can support people who want to prepare polished portrait images for creative, professional, or personal use. The usefulness of the tool depends on the user’s goals and the quality of the original photo.
For example, a freelancer may use skin enhancement to refine a profile photo, while a YouTube creator may prepare a portrait for a channel banner or promotional visual.
Meta reports that more than 600 million people have used filters on Facebook or Instagram – Source: Meta.
Common Practical Applications
- Social media selfies: Reduce distracting imperfections in selected personal photos.
- Professional profile pictures: Prepare a polished portrait for websites or professional platforms.
- Blog author portraits: Improve the presentation of author images while maintaining a recognizable appearance.
- YouTube creator photos: Refine a portrait before incorporating it into a thumbnail or promotional design.
- Personal branding: Maintain a consistent visual style across selected profile images.
- Beauty-related content: Prepare portrait visuals for educational or editorial content.
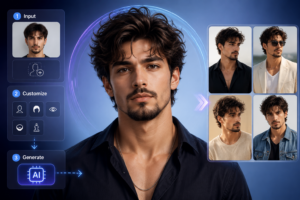
Photo AI Studio also offers other portrait-related features, including professional headshots and additional editing tools. Those features should be evaluated separately from the specific AI Skin Enhancer workflow — Source: [Photo AI Studio, 2026].
This is especially useful for profile pictures and professional photos. If you’re curious about the best way to capture or generate one, take a look at How to Get a Professional Headshot (AI or Camera).
What’s Next? How Can You Improve Your AI Photo Editing Workflow?
Improving an AI photo editing workflow requires repeated testing, careful comparison, and a consistent review process. Instead of relying on one generated result, experiment with different image conditions and editing approaches.
For example, compare a well-lit portrait with a darker portrait to understand how the original images affect the final appearance.
Build a Repeatable Editing Routine
Use the following workflow for future portraits:
- Select a clear, suitable original photo.
- Upload the image to the AI skin enhancement tool.
- Generate the enhanced result.
- Compare the result with the original.
- Check facial details and overall realism.
- Save the final image only after reviewing it.
- Use other editing tools when additional adjustments are necessary.
You can combine skin enhancement with appropriate lighting corrections, background editing, or image upscaling when these changes support the final purpose. However, each additional edit should be reviewed to avoid unnecessary changes.
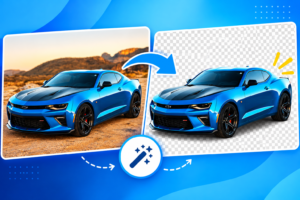
After enhancing your skin, removing a cluttered or distracting background can make the final image pop even more. Here’s how to use a background remover to get transparent images instantly to finish the job.
Frequently Asked Questions (FAQs)
Q1: Can AI Skin Enhancers Remove Blemishes From Photos?
A: Yes, AI skin enhancers can reduce the appearance of blemishes, acne marks, and other visible skin imperfections, depending on the tool’s capabilities. The results vary according to the original photo, image quality, and enhancement process.
Q2: Can AI Skin Enhancement Make Photos Look Unnatural?
A: Yes, excessive skin smoothing can make portraits look artificial by removing natural texture and facial details. Use balanced enhancement and compare the edited image with the original to maintain a realistic appearance.
Q3: Is AI Skin Enhancement Suitable for Professional Headshots?
A: Yes, AI skin enhancement can be useful for professional headshots by refining the appearance of selected facial areas. However, users should review the result carefully to ensure that the portrait remains recognizable and appropriate for professional use.
Q4: Can Beginners Use an AI Skin Enhancer Without Editing Experience?
A: Yes, beginners can use AI skin enhancers through simple upload-and-generate workflows. Tools such as Photo AI Studio can help users explore automated portrait enhancement without requiring advanced photo editing knowledge.
Conclusion: Use AI Skin Enhancement for More Refined Portraits
AI skin enhancement is a practical way to support portrait editing by automating selected changes to facial skin appearance. It can help reduce repetitive work and prepare photos for social media, professional profiles, and personal branding.
Photo AI Studio offers a straightforward upload-and-generate workflow for exploring its AI Skin Enhancer. However, results depend on the original image, the tool’s capabilities, and the editing process.
By choosing clear photos, reviewing results carefully, and avoiding excessive smoothing, you can build a more consistent and natural-looking portrait editing workflow.
Have you tried using an AI skin enhancer to improve your portrait photos?
Written by
Muthumanickam — SEO, Blogging, Affiliate Marketing, and Content Creation Specialist with 5+ years of experience across digital platforms.